
 By
By ![How-to-Develop-an-iOS-App-[A-Complete-Guide]](https://www.spaceotechnologies.com/wp-content/uploads/2021/05/How-to-Develop-an-iOS-App-A-Complete-Guide.jpg)
Contents
Building an app for Apple’s ecosystem is one of the most rewarding investments a business or entrepreneur can make. But knowing how to develop an iOS app the right way requires more than just writing code. It involves planning, choosing the right tools, designing for Apple’s standards, testing thoroughly, and navigating the App Store submission process. Whether you handle it in-house or partner with professional iOS app development services, the process follows a defined path.
Whether you want to develop an iPhone app for a startup idea or build an enterprise solution for thousands of users, the iOS app development process follows a structured path. From setting up your Mac and Xcode to publishing on the App Store, every step matters.
This guide walks you through how to develop an iOS app using four proven approaches: native, cross-platform, hybrid, and no-code. You will also learn about the tech stack, costs, timelines, common challenges, and best practices that define successful iOS application development.
By the end, you will have a clear understanding of how to develop an iOS app from scratch, regardless of your technical background or budget.
What is iOS App Development?
iOS app development is the process of creating software applications that run on Apple devices, including iPhone, iPad, Apple Watch, and Apple TV. It involves writing code, designing user interfaces, integrating backend services, testing for performance, and publishing through the App Store.
At its core, iOS mobile app development revolves around Apple’s ecosystem. Developers use iOS app development software like Xcode as the primary IDE, write code in Swift or Objective-C, and follow Apple’s Human Interface Guidelines (HIG) to create apps that feel consistent with the platform’s design standards.
Apple provides the iOS SDK, which includes Swift iOS frameworks, libraries, APIs, and tools that developers use to build everything from simple utility apps to complex enterprise solutions. The SDK gives access to device features like the camera, GPS, Face ID, push notifications, Core Data for local storage, and ARKit for augmented reality.
iOS application development also extends beyond just coding. It includes:
- Wireframing and prototyping the user experience
- Setting up the app architecture using patterns like MVC or MVVM
- Integrating REST APIs for backend communication
- Configuring CI/CD pipelines for automated builds and deployments
- Implementing authentication, offline storage, and push notifications
What makes app development for iOS distinct is Apple’s controlled ecosystem. Unlike Android, where apps run on thousands of device configurations, iOS apps target a defined set of hardware. This means fewer compatibility issues, more predictable performance, and a smoother path from development to deployment through App Store Connect.
Why Should You Develop an iOS App?
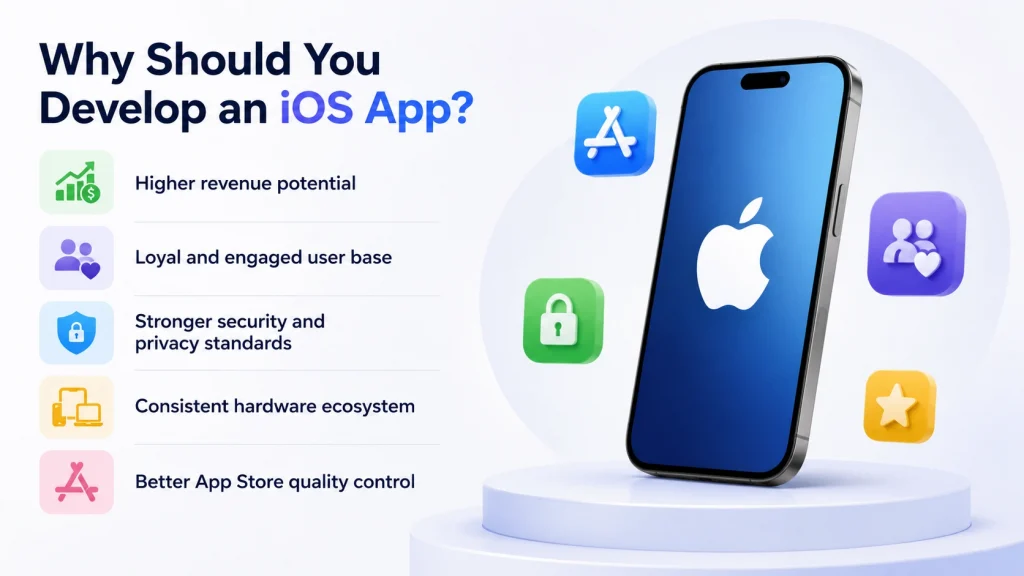
Before diving into how to develop an app for iOS, it is worth understanding why the platform deserves your attention. iOS users represent one of the most valuable audiences in the mobile market, and the platform offers several advantages that directly impact your app’s success.
- Higher revenue potential: iOS users consistently spend more on apps and in-app purchases compared to Android users. The App Store generates significantly higher revenue per download, making it the preferred platform for apps with subscription models, premium pricing, or in-app commerce. If monetization is a priority, developing applications for iPhone gives you access to an audience that is willing to pay.
- Loyal and engaged user base: Apple users tend to be highly engaged with their devices and the apps they use. They update to the latest iOS versions quickly, which means you can adopt new APIs, frameworks, and features like SwiftUI updates without worrying about fragmentation. This loyalty translates to higher retention rates, more consistent usage patterns, and better lifetime value per user.
- Stronger security and privacy standards: Apple enforces strict security protocols across its ecosystem. Features like App Transport Security, data encryption, keychain services, and mandatory privacy disclosures protect both developers and users. If your app handles sensitive data, especially in healthcare, finance, or enterprise environments, iOS provides a more secure foundation for authentication, offline storage, and data transmission.
- Consistent hardware ecosystem: Unlike Android’s thousands of device variations, iOS runs on a defined set of Apple hardware, including iPhone, iPad, and iPod Touch. This dramatically reduces the time spent on debugging device-specific issues. When you build an iOS app, you can optimize for a handful of screen sizes and chipsets rather than hundreds, leading to faster development cycles and more predictable performance.
- Better App Store quality control: Apple’s App Store review process is rigorous, which means users trust the apps they download. While the review adds a step to your deployment timeline, it also filters out low-quality and malicious apps. Being published on the App Store carries credibility, and the curated nature of the marketplace gives well-built apps a better chance of visibility.
Ready to Build a High-Performance iOS App?
Our Swift developers design, develop, and deploy iOS apps that deliver seamless performance and follow Apple’s Human Interface Guidelines.

Types of iOS Apps
Before choosing how to build an iOS app, it helps to understand the different types of apps you can create for the platform. Each type has its own strengths and trade-offs.
Native iOS apps
Native apps are built specifically for iOS using Apple’s own languages and tools. You write them in Swift or Objective-C, design interfaces with SwiftUI or UIKit through Interface Builder, and compile them using Xcode. Native apps have full access to every iOS feature, deliver the best performance, and provide the smoothest user experience. They are the standard for apps that demand speed, complex animations, deep hardware integration, or tight alignment with Apple’s Human Interface Guidelines.
Cross-platform apps
Cross-platform apps share a single codebase across iOS and Android. Popular mobile app development platforms like Flutter, React Native, and Kotlin Multiplatform allow developers to write once and deploy to both platforms. These apps compile to near-native performance and can access most device features through platform-specific modules. Cross-platform development is ideal when you need to reach both iOS and Android users without maintaining two separate codebases.
Hybrid apps
Hybrid apps use web technologies like HTML, CSS, and JavaScript wrapped inside a native container. Frameworks like Ionic and Apache Cordova package the web app into a WebView that runs on the device like a native app. Hybrid apps are cost-effective and fast to build, especially if your team already has web development expertise. However, they have limitations in performance, animation smoothness, and access to native features compared to native and cross-platform apps.
No-code/low-code apps
No-code apps are built using visual drag-and-drop platforms like FlutterFlow, Adalo, or Bubble without writing any code. These platforms handle the technical complexity behind the scenes, allowing entrepreneurs, business owners, and non-technical teams to create functional iOS apps. They work well for MVPs, simple business apps, and internal tools but may not scale for complex, feature-rich applications.
How to Develop an iOS App Natively
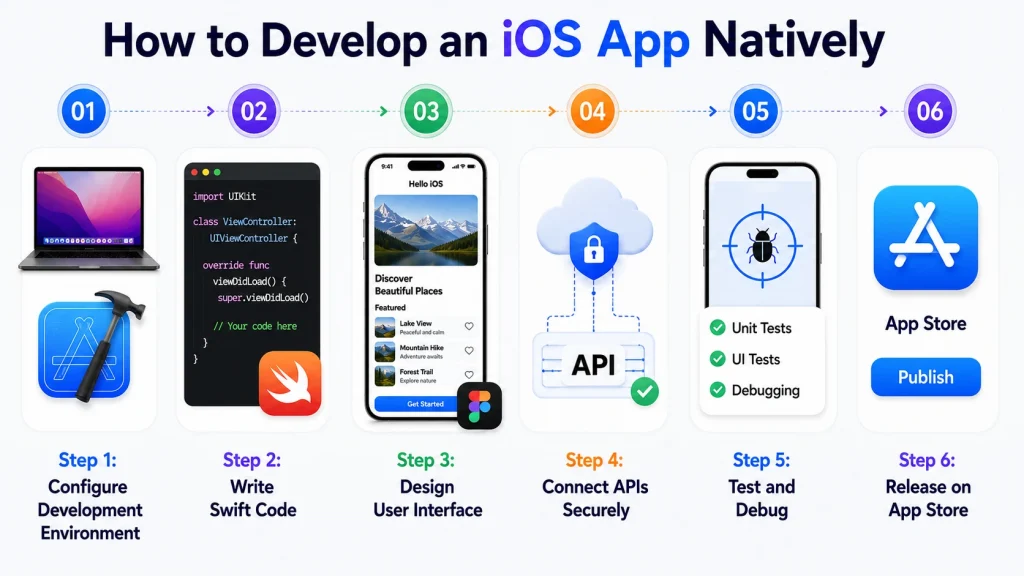
Native iOS development means building your app specifically for Apple devices using Apple’s own programming languages and tools. This approach delivers the best performance, smoothest animations, and complete access to every iOS feature. If you want to know how to develop an iOS app that feels seamless and performs at its peak, native development is the strongest choice.
Step 1: Set up Xcode and enroll in the Apple Developer Program
Xcode is Apple’s official integrated development environment and the only tool you can use to build, test, and submit native iOS apps. Download it for free from the Mac App Store. Once installed, you get access to:
- Interface Builder for visual UI design
- The iOS Simulator for testing across screen sizes
- A code editor with syntax highlighting and autocomplete
- Debugging tools and performance profiling instruments
- Xcode Project templates to scaffold new apps quickly
Next, enroll in the Apple Developer Program, which costs $99 per year. This membership is required to publish your app on the App Store, access beta versions of iOS, and use services like push notifications, in-app purchases, and CloudKit. Without this enrollment, you can build and test apps locally but cannot distribute them to real users.
Step 2: Choose between Swift and Objective-C
Swift is Apple’s modern programming language introduced in 2014. It offers clean syntax, strong type safety, better memory management, and faster compilation. Apple actively promotes Swift as the future of iOS application development, and most new Xcode Project setups default to it.
Objective-C is the older language that powered iPhone app development for over two decades. While it is still supported and many legacy apps run on it, Apple no longer adds major updates to the language. Choose Objective-C only if you are working on an existing app built with it or need to maintain compatibility with older codebases. For new projects, Swift is the recommended choice.
Step 3: Design the user interface using SwiftUI or Storyboard
SwiftUI is Apple’s declarative UI framework that lets you build interfaces using Swift code. It offers live previews in Xcode, less boilerplate, and automatic support for dark mode, dynamic type, and accessibility features. SwiftUI integrates tightly with the iOS SDK and works best for apps targeting iOS 15 and above.
Interface Builder with Storyboard is the traditional visual approach where you drag and drop UI elements within Xcode. It provides a clear visual representation of your app’s screen flow through the storyboard canvas, making it easier for beginners to understand navigation and layout. Many production apps still use Storyboard, and some teams combine both approaches depending on the screen complexity.
Whichever tool you choose, follow Apple’s Human Interface Guidelines (HIG) to ensure your app looks and feels consistent with the iOS ecosystem.
Step 4: Write the app logic and connect APIs
This is where you build the core functionality of your iOS app. Key tasks at this stage include:
- Defining data models and writing business logic
- Handling user interactions and navigation flows
- Managing data persistence using Core Data, Realm, or UserDefaults
- Integrating REST API endpoints using URLSession or Alamofire
- Setting up authentication using Apple Sign-In, OAuth, or Firebase
- Implementing real-time features like chat or live updates via WebSockets
Firebase also provides cloud storage, analytics, and crash reporting, making it a popular backend choice for iOS apps.
Structure your code using a clean architecture pattern. MVC (Model-View-Controller) is Apple’s default recommendation, while MVVM (Model-View-ViewModel) is widely adopted for its testability and separation of concerns. Choosing the right architecture early prevents messy code as the app grows.
Step 5: Test using XCTest and beta test through TestFlight
Testing ensures your iOS app performs reliably before reaching users. XCTest is Apple’s built-in testing framework that supports unit testing for validating individual functions and UI testing for simulating user interactions across screens. Debugging tools in Xcode help you identify and fix issues during development.
Use Xcode’s Instruments tool to profile memory usage, CPU performance, network activity, and energy consumption. Test on the iOS Simulator for quick layout checks across different screen sizes, including iPhone and iPad models.
After internal testing is complete, upload a beta build to TestFlight. This allows you to invite up to 10,000 external testers who can install and test your app on a physical device, provide feedback, and report crashes before the public launch. Physical device testing is essential because simulators cannot replicate hardware-specific behavior like camera, Face ID, and NFC interactions.
Step 6: Submit the app to the App Store via App Store Connect
App Store Connect is Apple’s web portal where you manage your app listing, pricing, in-app purchases, and release schedule. Prepare your App Store submission by:
- Uploading screenshots for different device sizes
- Writing a compelling app description
- Selecting the right category
- Adding relevant keywords for App Store Optimization
- Configuring pricing and availability
Before submission, complete code signing by configuring your certificates and provisioning profiles in Xcode. Review Apple’s App Review Guidelines carefully. Common rejection reasons include incomplete functionality, misleading descriptions, privacy policy violations, and poor UI quality. Once submitted, Apple typically reviews the app within 24 to 48 hours. After approval, app publishing is immediate, or you can schedule a specific launch date.
Native development is the gold standard for iOS mobile app development. It gives you full control over performance, UI/UX design, and device capabilities. However, it requires a dedicated iOS team and a higher budget compared to other approaches. If your priority is building a high-performance, feature-rich app exclusively for Apple devices, this is the path to follow. But if you also need an Android version, the next approach offers a more cost-effective alternative.
Want to Launch Your iOS App Faster?
Our team has built 100+ iOS apps across healthcare, fintech, ecommerce, and enterprise. Let us handle the development.
How to Develop an iOS App Using Cross-Platform Frameworks
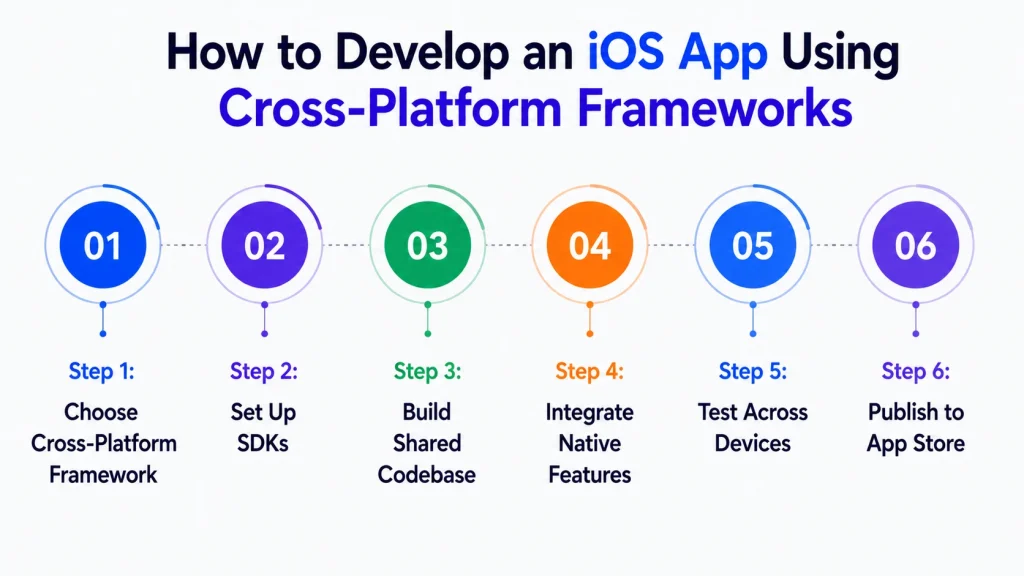
Cross-platform development allows you to write a single codebase that runs on both iOS and Android. This approach significantly reduces development time and cost since you do not need separate teams for each platform. If you are exploring how to make an iPhone app that also works on Android without doubling your effort, cross-platform frameworks are a practical solution.
Step 1: Pick a framework like Flutter, React Native, or Kotlin Multiplatform
Each framework has distinct strengths:
- Flutter is Google’s UI toolkit that uses the Dart programming language. It compiles directly to native ARM code, offers a rich set of customizable widgets, and delivers consistent UI across platforms. Flutter is a strong choice for apps where custom UI/UX design and smooth animations are a priority.
- React Native is Meta’s framework built on JavaScript and React. It uses native components under the hood, which means the app looks and feels native on each platform. React Native is ideal if your team already has JavaScript expertise or you want access to a large ecosystem of community libraries.
- Kotlin Multiplatform allows you to share business logic written in Kotlin across iOS and Android while keeping the UI layer native to each platform using SwiftUI or UIKit for iOS. This is a good option when you want maximum native experience with shared backend logic.
Choose based on your team’s existing skills, the app’s complexity, and performance requirements.
Step 2: Set up the development environment and install the required SDKs
Setup varies by framework:
- Flutter: Install the Flutter SDK, Dart, and Xcode for iOS builds. Use Android Studio or VS Code as your code editor. Run “flutter doctor” to verify all dependencies are correctly configured.
- React Native: Install Node.js, the React Native CLI or Expo CLI, and Xcode. Expo simplifies the setup for beginners but limits access to some native modules. The bare React Native CLI provides full control over the native layer.
- Kotlin Multiplatform: Install Android Studio with the KMM plugin and Xcode for iOS. Configure Gradle to handle the shared module and platform-specific targets.
Regardless of the framework, you still need a Mac with Xcode installed to build and test the iOS version of your app. The iOS SDK is only available through Xcode on macOS. If you are on Linux, explore the options for iOS development on Linux before setting up your environment.
Step 3: Build a single shared codebase for iOS and Android
Structure your project so the core business logic, API integration calls, state management, and data processing live in one shared codebase. In Flutter, everything from UI to logic is shared by default. In React Native, the JavaScript layer handles most logic and UI, while native modules bridge platform-specific gaps. In Kotlin Multiplatform, you explicitly define which code is shared and which is platform-specific.
Follow a clean app architecture pattern to keep your shared code modular. Separate your presentation layer, domain layer, and data layer so that any platform-specific adjustments do not require rewriting the entire codebase.
Step 4: Use platform-specific modules to access native device features
While the shared codebase covers most functionality, some features require platform-specific code, including:
- Camera and photo library access
- Biometric authentication (Face ID, Touch ID)
- Push notifications
- Bluetooth and NFC
- Offline storage and local databases
In Flutter, use official plugins from pub.dev such as camera, local_auth, and firebase_messaging. In React Native, use native modules or community packages from npm. In Kotlin Multiplatform, write expect/actual declarations where the shared module defines the interface and each platform provides its own implementation.
Always test these modules on real iOS devices since the iOS Simulator does not support all hardware features. Physical device testing is critical for validating these integrations.
Step 5: Test on iOS simulators and physical devices
Run the app on Xcode’s iOS Simulator to check layout, navigation, and basic functionality across different screen sizes, including iPhone SE, iPhone 15, and iPad models.
Then test on a physical device to validate camera access, push notifications, biometric login, GPS accuracy, and real-world network conditions. Use framework-specific testing tools like Flutter’s integration tests, React Native’s Detox, or Kotlin’s shared test modules for unit testing across platforms.
Also test for edge cases like poor network connectivity, low battery, interrupted downloads, and background-to-foreground transitions. Debugging cross-platform issues often requires checking both the framework layer and the native iOS layer.
Step 6: Generate the iOS build and submit to the App Store
Once testing is complete, generate the release build for iOS:
- Flutter: Run “flutter build ios” and open the output in Xcode.
- React Native: Use Xcode to archive the build.
- Kotlin Multiplatform: Build the iOS framework and integrate it into the Xcode Project.
Complete code signing with your Apple Developer certificate, configure provisioning profiles, and archive the app in Xcode. Upload the build to App Store Connect using Xcode or Transporter. Fill in the app listing details, screenshots, and metadata, then submit for Apple’s App Store submission review.
Cross-platform frameworks offer the most balanced approach to developing iPhone apps for both major platforms simultaneously. You save time, reduce costs, and maintain a single codebase while still delivering near-native performance. This is a popular choice for startups and businesses looking to reach both iOS and Android users quickly. However, if budget is your primary concern and the app is content-focused rather than feature-heavy, the hybrid approach covered next could save you even more.
How to Develop an iOS App Using the Hybrid Approach
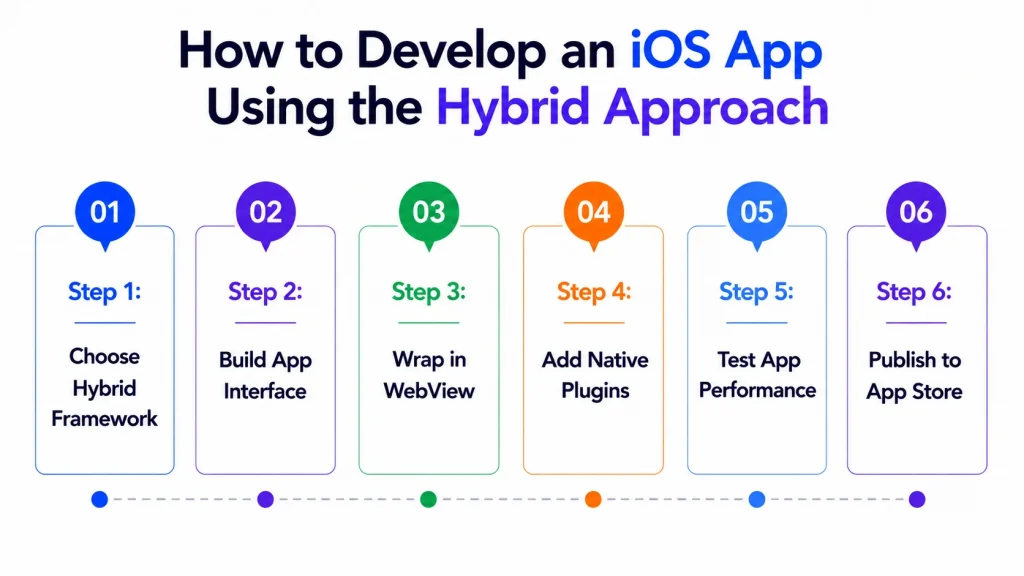
Hybrid development lets you build an iOS app using web technologies like HTML, CSS, and JavaScript. The web app runs inside a native WebView container, which makes it installable and distributable through the App Store. For teams already experienced with web development, this is one of the fastest and most affordable ways of developing applications for iPhone.
Step 1: Choose a hybrid framework like Ionic or Apache Cordova
- Ionic is a popular hybrid framework that provides a library of pre-built mobile UI components styled to look native on iOS and Android. It supports Angular, React, and Vue as frontend frameworks and uses Capacitor (its modern runtime) to access native device features.
- Apache Cordova is the original hybrid app framework that wraps your web app in a WebView and provides JavaScript APIs to access device features through plugins. It is less opinionated about the frontend framework, giving you flexibility to use whatever web stack you prefer.
Choose Ionic if you want polished UI components and an active ecosystem. Choose Cordova if you need maximum flexibility with your existing web codebase.
Step 2: Build the app interface using HTML, CSS, and JavaScript
Design and develop the app interface just as you would build a responsive website. Use HTML for structure, CSS for styling, and JavaScript for interactivity. You can use frontend frameworks like Angular, React, or Vue to manage components, routing, and state.
Since the app runs inside a WebView, focus on optimizing for mobile screen sizes. Use responsive design patterns, touch-friendly tap targets, and mobile-first CSS. Avoid heavy DOM manipulation and large image assets that could slow down rendering inside the WebView. While this is not traditional iPhone app development, the result is still an installable iOS app.
Step 3: Wrap the web app inside a native WebView container
The hybrid framework packages your web app inside a native shell that contains a WebView component. This WebView loads your HTML, CSS, and JavaScript just like a browser would, but the app is installed on the device and launched like a native app.
- In Ionic with Capacitor, run “npx cap add ios” to generate the native iOS project.
- In Cordova, run “cordova platform add ios” to create the iOS wrapper.
- Both generate an Xcode Project that you can open, configure, and build on your Mac.
Step 4: Add plugins to access native features like the camera and location
Since web code running in a WebView cannot directly access hardware features, hybrid frameworks use plugins to bridge this gap. Plugins provide JavaScript APIs that communicate with native code under the hood.
- Ionic with Capacitor: Install plugins like @capacitor/camera, @capacitor/geolocation, and @capacitor/push-notifications.
- Cordova: Use cordova-plugin-camera, cordova-plugin-geolocation, and similar community plugins for push notifications and offline storage capabilities.
Be selective with plugins. Each one adds to the app size and introduces a dependency you must maintain. Only install plugins for features your app actually uses.
Step 5: Test across multiple iOS devices for UI and performance
Hybrid apps are more prone to performance inconsistencies across devices compared to native or cross-platform apps. Test thoroughly on both older and newer iPhones to identify rendering issues, slow transitions, and unresponsive touch interactions.
Use Safari’s Web Inspector to debug the WebView content on a connected iOS device. Check for:
- Memory leaks and JavaScript errors
- Network request performance
- Scroll performance and animation smoothness
- Input field behavior with the iOS keyboard
- Rendering consistency across screen sizes
Run tests on the iOS Simulator first, then validate on a physical device for accurate results.
Step 6: Package the app and publish to the App Store
Open the generated Xcode project and configure the app’s bundle identifier, version number, and code-signing certificates. Set the app icon and launch screen assets as required by Apple’s specifications.
Archive the build in Xcode, validate it, and upload to App Store Connect. Complete the listing with screenshots, app description, privacy policy URL, and support URL. Submit for review and ensure the app meets Apple’s quality standards. Apple tends to scrutinize hybrid apps more closely for performance and user experience during the App Store submission process, so make sure the app feels smooth and responsive.
The hybrid approach is a practical shortcut for app development for iOS when your team has strong web development skills and the app does not require heavy animations or complex native features. It works well for content-driven apps, internal business tools, and MVPs where speed to market matters more than peak performance. That said, if you want to skip coding entirely, the next approach lets you build an iPhone app using visual tools with no programming required.
How to Develop an iOS App Without Code
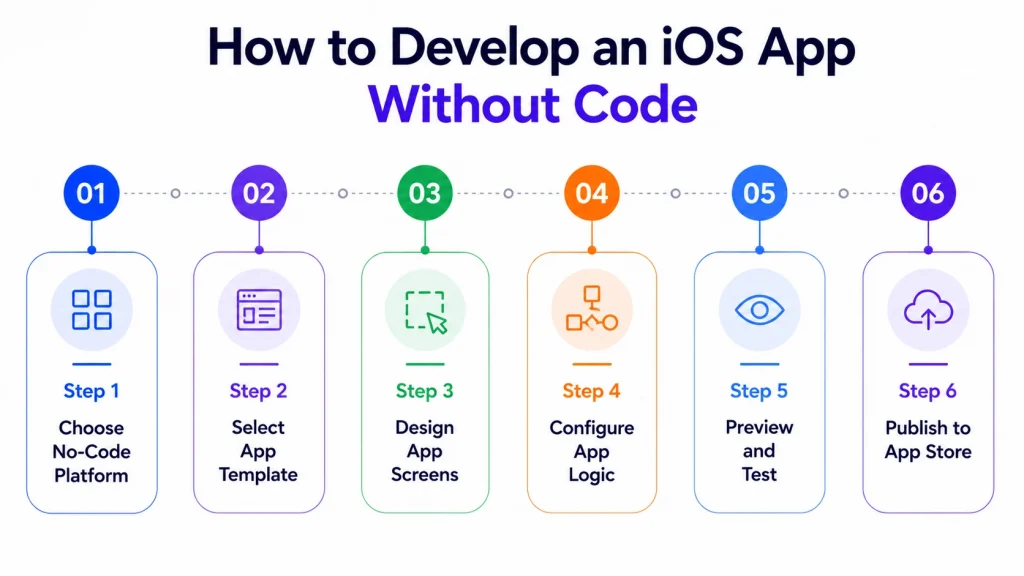
No-code and low-code platforms allow you to build functional iOS apps using visual builders instead of writing code. These platforms are ideal for entrepreneurs validating an idea, small businesses needing a simple app, or teams building internal tools quickly. If you have ever wondered how to build iPhone apps without learning Swift or JavaScript, this approach makes it possible.
Step 1: Select a no-code platform like FlutterFlow, Adalo, or Bubble
Each platform serves different needs:
- FlutterFlow generates actual Flutter code, which means you can export and customize the code later if your app grows beyond the platform’s capabilities. It is best for apps that need polished UI/UX design and may eventually transition to developer-maintained code.
- Adalo is a beginner-friendly platform with a simple drag-and-drop builder and built-in database. It works well for basic apps like directories, booking systems, and community platforms.
- Bubble is a powerful no-code tool for building web apps with complex logic, workflows, and database structures. While Bubble primarily produces web apps, you can wrap them for iOS distribution using tools like BDK Native. It is essentially an App Template system that lets you customize without code.
Choose based on how complex your app is, whether you might need to export the code later, and how comfortable you are with visual logic builders.
Step 2: Choose a pre-built template or start with a blank project
Most no-code platforms offer an App Template library for common app types, including:
- Marketplaces and ecommerce stores
- Social networks and community platforms
- Task managers and productivity tools
- Fitness trackers and health apps
- Food delivery and booking systems
Templates come with pre-designed screens, navigation flows, and basic logic that you can customize. Starting from a template saves time when your app follows a common pattern. Starting from a blank project gives you full control over the structure and design but requires more effort in setting up each screen and workflow from scratch.
Step 3: Design app screens using the drag-and-drop builder
Use the visual editor to place elements like text fields, buttons, images, lists, forms, and navigation bars on each screen. Most platforms offer responsive design settings so the layout adapts to different iPhone and iPad screen sizes.
Focus on keeping the design clean and intuitive. Follow iOS design conventions outlined in Apple’s Human Interface Guidelines, including bottom tab navigation, card-based layouts, and consistent spacing. Even though you are not writing code, poor wireframing and prototyping decisions will hurt user experience just as much.
Step 4: Configure database, user flows, and third-party integrations
Set up your app’s database to store and manage data like user profiles, orders, bookings, or content entries. Most platforms provide a built-in database with a spreadsheet-like interface where you define collections (tables), fields, and relationships. This replaces the need for Core Data or Firebase setup that coded apps require.
Configure user flows such as:
- Sign up and log in with authentication
- Password reset and account recovery
- Role-based access control
- Onboarding sequences for new users
Then connect third-party services like Stripe for payments, Google Maps for location features, or Zapier for automating workflows between your app and other tools like email marketing platforms or CRMs.
Step 5: Preview and test the app within the platform
All no-code platforms offer a preview mode where you can interact with your app as a user would. Test every screen, button, form, and workflow to make sure things behave as expected.
Check for:
- Broken links and navigation errors
- Empty states (what the user sees when there is no data)
- Error messages for invalid inputs
- Loading times for data-heavy screens
Some platforms also offer a companion app that lets you test directly on your iPhone in real time as you make changes, similar to how physical device testing works in traditional development.
Step 6: Export the build and publish to the App Store
Once your app is tested and finalized, generate the iOS build:
- FlutterFlow: Export the Flutter source code and build the iOS app through Xcode.
- Adalo: The platform handles the build process and provides a downloadable package.
- Bubble: Use a wrapper service to package the web app for iOS.
You still need an Apple Developer Program membership ($99/year) for app publishing on the App Store. Upload the build to App Store Connect, complete the listing with screenshots and metadata, and submit for Apple’s review. Keep in mind that Apple reviews no-code apps with the same standards as coded apps, so functionality and performance must meet their guidelines for App Store submission.
No-code platforms have made it possible for anyone to develop an iPhone app without writing a single line of code. They are perfect for testing ideas quickly, building simple apps, and getting to market fast. However, as your app grows in complexity, you may eventually need to transition to a coded solution for better scalability and customization. Now that you understand all four approaches, the next section will help you decide which one fits your specific needs.
Which iOS Development Approach Should You Choose?
Choosing the right approach to develop an app for iOS depends on your budget, timeline, team skills, and how complex the app needs to be. Having a clear mobile app development strategy before you start helps avoid costly pivots later. Here is a comparison to help you decide.
| Factor | Native | Cross-Platform | Hybrid | No-Code |
|---|---|---|---|---|
| Performance | Excellent | Very Good | Moderate | Basic |
| Development Cost | High | Medium | Low | Very Low |
| Time to Market | Longer | Moderate | Fast | Fastest |
| UI/UX Quality | Best | Very Good | Acceptable | Basic |
| Access to Native Features | Full | Most | Limited (via plugins) | Very Limited |
| Scalability | Excellent | Good | Limited | Limited |
| Codebase | iOS only | Shared (iOS + Android) | Shared (web-based) | No code |
| Best For | High-performance apps, complex features, Apple-exclusive products | Multi-platform apps, startups, MVPs with growth plans | Content apps, internal tools, budget-conscious projects | Idea validation, simple apps, non-technical founders |
Choose native if performance, design precision, and deep Apple ecosystem integration are non-negotiable. Choose cross-platform if you need both iOS and Android from a single codebase. Go hybrid if web skills are your strength and the app is content-focused. Pick no-code if you want to validate fast without hiring developers.
Not Sure Which iOS Development Approach Fits?
Share your app idea with our iOS experts and get a tailored development roadmap with cost estimates and timeline.
iOS App Development Tech Stack
The right tech stack lays the foundation for how to develop an iOS mobile app that is reliable, scalable, and maintainable. Here is what a modern iOS app development tech stack looks like across key layers.
Programming languages
Swift is the primary language for modern iOS app development. It is fast, safe, and actively maintained by Apple. SwiftUI and UIKit are the two main frameworks for building user interfaces:
- SwiftUI for declarative, modern UI code with live previews
- UIKit for programmatic or storyboard-based interfaces with mature documentation
Objective-C remains relevant for maintaining legacy codebases but is rarely used for new projects.
IDEs and development tools
Xcode is the only fully supported IDE for iOS development. It includes:
- Interface Builder for visual UI design
- A powerful code editor with refactoring support
- The iOS Simulator for testing across device sizes
- Instruments for profiling performance and memory usage
- Accessibility Inspector for testing VoiceOver and Dynamic Type
Some developers supplement Xcode with VS Code or AppCode for specific editing tasks, but Xcode remains the hub of the app development process.
Backend and database
For backend development services, Firebase offers authentication, real-time databases, cloud storage, and crash reporting in a single platform. For more control, developers use custom backends built with Node.js, Python (Django/Flask), or Ruby on Rails, connected through REST API or GraphQL endpoints.
For local data storage on the device:
- Core Data is Apple’s native framework for complex data models with relationships
- Realm offers a simpler alternative with cross-platform support
- UserDefaults handles lightweight key-value storage for preferences and settings
- Offline storage solutions ensure the app works without an internet connection
CI/CD and testing tools
Automated testing and continuous integration streamline the app development process:
- XCTest handles unit testing and UI testing within Xcode
- Fastlane automates code signing, builds, screenshots, and App Store submission
- GitHub Actions, Bitrise, and CircleCI run automated builds and tests on every code change
- Debugging tools built into Xcode help identify issues during development
Analytics and monitoring
After launch, performance optimization and monitoring become critical:
- Firebase Analytics and Crashlytics track user behavior and crash reports
- App Store Connect App Analytics provides download data, engagement metrics, and retention statistics
- Mixpanel, Amplitude, and New Relic help you understand how users interact with your app and where performance bottlenecks exist
These insights drive decisions for app updates and bug fixes.
How Much Does It Cost to Develop an iOS App?
Understanding the cost of iOS app development helps you plan your budget and choose the right development approach. The total cost depends on several factors, and there is no one-size-fits-all answer.
Factors that affect iOS app development cost
The biggest cost drivers in the app development process include:
- Complexity of features and functionality
- UI/UX design requirements and custom prototyping
- Backend infrastructure and API integration
- The development approach (native vs. cross-platform vs. hybrid vs. no-code)
- Team location and hourly rates
- Ongoing maintenance, app maintenance costs, and bug fixes
Apps with features like authentication, push notifications, payment gateways, real-time chat, offline storage, and admin dashboards cost significantly more than simple informational apps. Similarly, custom wireframing for unique designs adds to the budget compared to using standard templates.
Cost breakdown by app complexity
Here is a general cost range based on app complexity when you hire a professional iOS development team:
| App Complexity | Examples | Estimated Cost | Timeline |
|---|---|---|---|
| Simple | Calculator, timer, to-do list, single-purpose utility | $10,000 to $30,000 | 2 to 3 months |
| Medium | Social media app, e-commerce store, booking system | $30,000 to $80,000 | 3 to 6 months |
| Complex | Fintech app, healthcare platform, on-demand marketplace | $80,000 to $200,000+ | 6 to 12+ months |
These ranges assume a professional development team. Understanding the broader software development cost landscape helps set realistic expectations. Costs vary significantly based on whether you hire freelancers, an agency, or an in-house team. Geographic location also plays a major role: developers in North America and Western Europe charge higher rates than teams in South Asia or Eastern Europe. You can also hire a dedicated development team to optimize costs while maintaining quality.
No-code platforms can bring costs down to $500 to $5,000 for simple apps, while cross-platform development typically costs 30% to 40% less than native since you are building for both iOS and Android from one codebase.
Want an Accurate Cost Estimate for Your App?
Share your app requirements with our iOS development team and receive a detailed proposal with features, cost breakdown, and timeline.
How Long Does It Take to Build an iOS App?
How long does it take to develop an iOS app is one of the first questions anyone asks. Understanding how to develop an app that iOS users actually enjoy using requires realistic timelines. The answer depends on the app’s complexity, the team’s size, and the development approach.
Timeline by app complexity
| App Complexity | Estimated Timeline |
|---|---|
| Simple app (MVP, basic features) | 2 to 3 months |
| Medium app (multiple features, API integration) | 3 to 6 months |
| Complex app (advanced features, custom backend) | 6 to 12+ months |
These timelines cover the full app development process from wireframing and prototyping through development, testing, and App Store submission.
Factors that affect development time
Several factors can extend or shorten your timeline:
- Feature complexity: Apps requiring custom UI/UX design, complex animations, real-time data syncing, or offline storage capabilities take longer than apps using standard UI patterns.
- Team size and experience: A senior Swift developer will move faster than a junior developer learning the iOS SDK.
- Development approach: Using cross-platform frameworks like Flutter or React Native can reduce the timeline by 30% to 40% compared to building separate native apps.
- Third-party integrations: Each REST API, payment gateway, or analytics service adds integration and testing time.
- App Store review: While Apple typically reviews apps within 24 to 48 hours, rejections due to guideline violations can add days or weeks to the launch date.
Planning for at least one round of revision feedback is a good practice for app publishing through the Apple Developer Program.
Have an iOS App Idea Ready to Develop?
Our iOS developers turn validated ideas into production-ready apps using Swift, SwiftUI, and proven architecture patterns. Start today.
Common Challenges in iOS App Development
Even experienced teams face challenges when developing applications for iPhone. Being aware of these challenges upfront helps you plan better and avoid costly mistakes.
- App Store rejections
Apple has strict guidelines for design, functionality, privacy, and content. Common rejection reasons include missing privacy policies, incomplete features, broken links, and UI that does not follow the Human Interface Guidelines. Always review Apple’s latest guidelines before App Store submission.
- Device and OS fragmentation
While iOS has fewer devices than Android, you still need to support multiple iPhone and iPad models with different screen sizes, resolutions, and capabilities. Testing on both the iOS Simulator and a physical device is essential.
- Performance optimization
iOS users expect fast, smooth apps. Memory leaks, slow API calls, heavy image loading, and inefficient code can degrade performance. Use Xcode’s Instruments for debugging and profiling throughout development, not just at the end.
- Keeping up with iOS updates
Apple releases major iOS updates annually, often introducing new frameworks, deprecating old APIs, and changing design patterns. Your app needs regular updates to stay compatible and take advantage of new SwiftUI and UIKit features.
- Backend complexity
Apps that rely on real-time data, complex authentication flows, or heavy API integration require a robust backend. Poorly designed REST API endpoints or database structures create bottlenecks that affect the entire user experience. Whether you use Firebase or a custom backend, plan the architecture carefully.
- Code signing and provisioning
Apple’s code signing system involves certificates, provisioning profiles, and entitlements that must be correctly configured for development, testing, and production builds. Misconfigurations are one of the most common sources of frustration, especially for teams new to the Apple Developer Program.
- Security and privacy compliance
iOS apps must handle user data responsibly. Apple requires App Tracking Transparency disclosures, privacy nutrition labels, and proper encryption. Apps in regulated industries like healthcare and finance face additional compliance requirements around authentication and data storage.
Best Practices for iOS App Development
Following proven best practices leads to better code quality, smoother launches, and happier users. Here are the practices that experienced iOS teams rely on throughout the app development process.
1. Follow Apple’s Human Interface Guidelines (HIG)
Design your app to feel native to iOS. Use standard navigation patterns, consistent typography, proper spacing, and Apple’s recommended interaction patterns. Apps that follow HIG have higher approval rates and better user satisfaction.
2. Choose the right app architecture early
Adopt MVC, MVVM, or other proven iOS design patterns from the start. A well-structured codebase is easier to test, debug, and scale. Refactoring a poorly architected app later costs significantly more than getting it right initially.
3. Write tests from day one
Implement unit testing with XCTest for business logic and UI testing for critical user flows. Automated tests catch regressions early and give you confidence when pushing app updates. Pair this with CI/CD tools like Fastlane for automated builds and deployments.
4. Optimize for performance
Profile your app regularly using Xcode Instruments. Monitor memory usage, CPU load, network efficiency, and rendering speed. Lazy loading, image caching, efficient Core Data queries, and background task management are essential for performance optimization.
5. Design for offline first
Not every user has a stable internet connection. Implement offline storage so the app remains functional without connectivity. Sync data in the background when the connection is restored. Core Data and Realm both support offline-first architectures.
6. Prioritize security
Use Apple’s keychain services for storing sensitive data. Implement App Transport Security for all network calls. Add biometric authentication where appropriate. Never store passwords or tokens in plain text or UserDefaults.
7. Plan for App Store optimization (ASO)
Your App Store listing is your app’s storefront. Research keywords, write compelling descriptions, create high-quality screenshots, and use preview videos. ASO directly impacts discoverability and download rates after app publishing.
8. Collect user feedback early
Use TestFlight to get real user feedback before launch. Beta testers on a physical device catch issues that automated tests miss. Incorporate feedback into your development cycle for continuous improvement and timely bug fixes.
Need Expert Guidance to Build Your Next iOS Application?
Building a successful iOS app takes more than knowing Swift or Xcode. It needs a development partner who understands user behavior, App Store guidelines, and the technical choices that separate a good app from a great one. At Space-O Technologies, we have spent over a decade helping startups and enterprises turn iOS app ideas into real products, with 2800+ apps delivered across healthcare, fintech, on-demand, eLearning, and eCommerce.
Our iOS team handles every stage of development, from idea validation and UI/UX design to Swift coding, QA testing, App Store submission, and post-launch support. We also offer dedicated iPad app development services for businesses targeting larger-screen experiences. We follow Apple’s Human Interface Guidelines, write clean and maintainable code, and use the latest frameworks like SwiftUI, Core ML, and ARKit when your project needs them. Every project is covered by an NDA, so your idea stays protected from the first conversation.
Our work includes Glovo, a delivery app that secured $1.2 billion in funding and 30M+ downloads, Fyule Video Lab, an eLearning platform backed by $1.4 million, and Daymera, a goal-tracking app built for iOS users. Whether you are validating an MVP or modernizing a legacy app, our experts can help you build something users love. Share your idea today and get a free 30-minute consultation, a custom estimate, and a clear roadmap to launch.
Food Delivery App That Secured Funding of $1.2 Billion
Glovo is one of the unicorn apps developed by Space-O. Apple chose Glovo for its “Best of 2016” award. This iOS app offers multi-category grocery product delivery and has over 30 million app downloads. TechCrunch, Financial Times, and Bloomberg have covered this application.
Learn More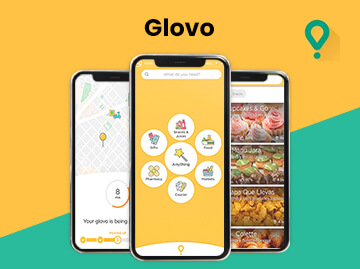
eLearning Platform That Secured Funding of $1.4 Million
We created Fyule Video Lab, a video learning platform for an EdTech startup, funded by $1.4 million from an Angel syndicate including leaders from Google, Deloitte, Tata 1mg, and Axis Capital. We developed this platform for iOS, Android, and web using Flutter, PHP, Laravel, and MySQL.
Learn More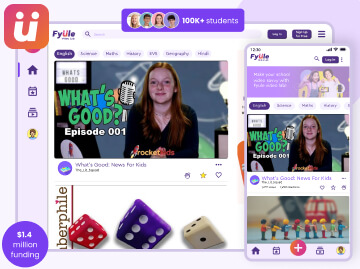
Daymera: Goal Tracking App Development for iOS Users
Daymera is a goal-tracking app for iOS users that allows them to track and achieve their goals. Apart from goal-tracking, it enables users to build connections and foster collaboration With features like goal setting, progress tracking, and user-friendly interfaces.
Learn More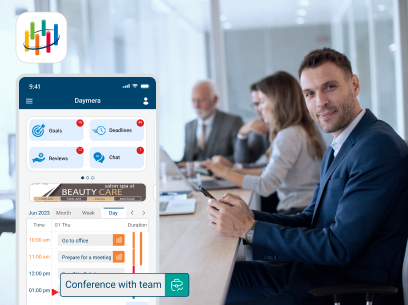
Frequently Asked Questions
How do I turn an app idea into an iOS app?
Start by defining the problem your app solves and who it serves. Validate the idea through market research and competitor analysis. Create wireframes and a prototype using tools like Figma or Sketch. Then choose your development approach (native, cross-platform, hybrid, or no-code), set up Xcode on your Mac, and begin building. If you lack technical skills, hire an experienced iOS app development company or use a no-code platform to bring your idea to life.
Can I build my own iOS app?
Yes. Anyone with a Mac and Xcode can learn how to develop an iOS app. Apple provides free resources including Swift Playgrounds, developer documentation, and WWDC videos. No-code platforms like FlutterFlow and Adalo also let you build functional iOS apps without coding knowledge. For complex applications, partnering with experienced iOS app development companies is often the fastest and most reliable option.
When should I start developing an iOS app?
Start developing once you have a validated idea, clearly defined features for your first version, wireframes or a prototype, and a realistic budget. Avoid jumping into development before the planning phase is complete. A well-defined scope prevents scope creep, reduces costs, and shortens time to market.
What do I need to develop an iOS app?
You need a Mac (MacBook or iMac) running macOS, Xcode (free from the Mac App Store), an Apple Developer Program membership ($99/year for App Store publishing), and knowledge of Swift or a cross-platform framework. If you do not have a Mac, you can still develop iOS apps on Windows using cloud-based Mac services or virtual machine solutions. For design, tools like Figma or Sketch help with wireframing and prototyping. For backend services, Firebase or a custom REST API setup handles data management and authentication.
Where do I start learning iOS app development?
Apple’s official documentation and Swift Playgrounds are the best starting points. Stanford’s free iOS development course on YouTube covers Swift and UIKit fundamentals. Hacking with Swift and Ray Wenderlich offer structured tutorials. For SwiftUI specifically, Apple’s SwiftUI tutorials walk you through building real apps step by step using the code editor in Xcode.
Where can I find iOS app development resources?
Apple’s Developer Documentation is the primary resource for the iOS SDK, frameworks, and APIs. The Swift.org community maintains language references and proposals. Stack Overflow answers specific debugging questions. GitHub hosts open-source iOS projects and libraries. WWDC session videos cover new features, best practices, and framework updates released with each iOS version.
What tools are used for iOS app development?
The core toolkit includes Xcode (IDE with Interface Builder, iOS Simulator, and code editor), Swift (programming language), SwiftUI or UIKit (UI frameworks), Core Data or Realm (local databases), Firebase (backend services), TestFlight (beta testing), and App Store Connect (app publishing). For CI/CD, teams use Fastlane, GitHub Actions, or Bitrise.
What features should my iOS app include first?
Focus on the features that directly solve your users’ core problem. Every app should have authentication (login/signup), a clean navigation structure, core functionality screens, push notifications for engagement, and basic analytics for tracking usage. Avoid feature bloat in the first version. Build, launch, collect feedback, then iterate with app updates.
What and why should I include in my first iOS MVP?
An MVP (Minimum Viable Product) includes only the features essential to test your app’s value proposition with real users. Include the one or two features that differentiate your app, basic authentication, a simple UI following Apple’s Human Interface Guidelines, and analytics to track usage. The purpose is to validate demand before investing in a full build. This approach reduces cost, accelerates time to market, and provides real user data to guide future development.
Why choose native iOS development over cross-platform?
Native development using Swift and Xcode delivers the best performance, smoothest animations, and complete access to every iOS feature and API. It follows Apple’s design patterns natively, resulting in the best user experience on iPhone and iPad. Choose native when your app requires complex animations, heavy hardware integration, AR/VR capabilities, or when iOS is your only target platform. Cross-platform is better when the budget is limited and you need both iOS and Android simultaneously.
How much does it cost to develop an iOS app?
Costs range from $10,000 to $30,000 for simple apps, $30,000 to $80,000 for medium-complexity apps, and $80,000 to $200,000+ for complex, feature-rich applications. Factors include app complexity, UI/UX design requirements, backend infrastructure, API integration, development approach, and team location. No-code platforms can reduce costs to under $5,000 for basic applications.
How hard is it to develop an iOS app?
Difficulty depends on your technical background and the app’s complexity. Learning Swift basics takes a few weeks. Building a simple app with standard features is achievable for a dedicated beginner within 2 to 3 months. Complex apps with real-time features, custom backends, and advanced animations require experienced developers. The iOS SDK is well documented, and Apple’s developer community is one of the most supportive in the industry.
When and how should I test my iOS app?
Test throughout the entire development process, not just at the end. Start with unit testing using XCTest as you build each feature. Use the iOS Simulator for interface testing, then validate functionality on physical devices for hardware features like Face ID, camera access, and push notifications. Before launch, distribute beta builds through TestFlight, and after release, monitor crash reports and performance using Firebase Crashlytics and App Store Connect analytics.
Why do iOS apps get rejected from the App Store?
Common rejection reasons include incomplete functionality, app crashes, misleading descriptions or screenshots, missing privacy policies, unnecessary permission requests, use of private APIs, poor performance, and violations of Apple’s App Review Guidelines or Human Interface Guidelines. Thorough testing, accurate metadata, and compliance with Apple’s submission requirements significantly improve approval chances.



 All our projects are secured by NDA




 4.8
4.8