By
By 
In this Android app tutorial, we have demonstrated a simple Android application about turning on and off device flashlight/torchlight with a touch. This tutorial helps beginner Android developers to implement flashlight in Android app.
9 Steps to Develop Flashlight App for Android Phone
Following this tutorials, you can easily develop your own flashlight apps for Android phone and deployed it on Google play.
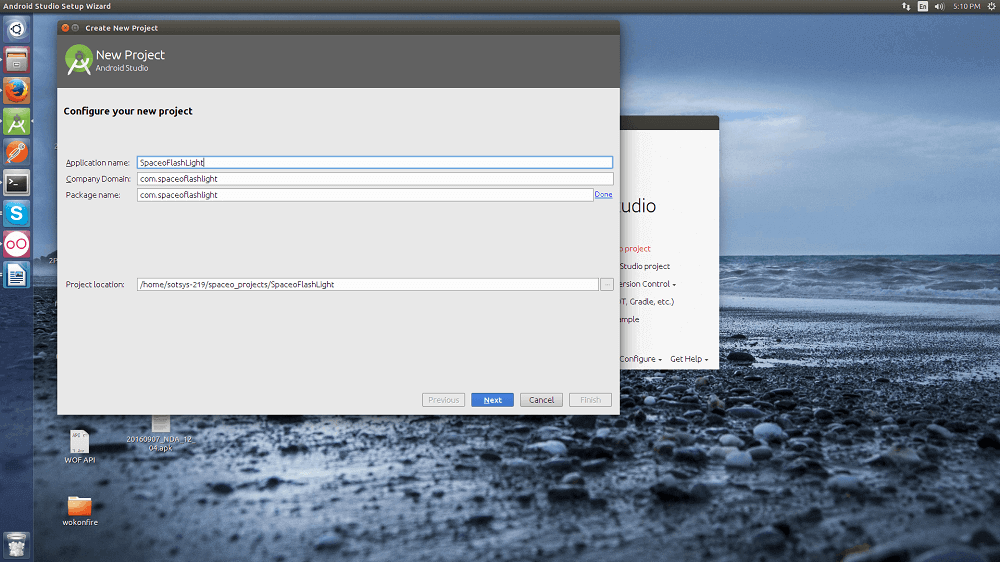
 Creating a new Android Studio project
You have to open Android Studio and create a new project by going to File >> New >> New Project. Enter the Application Name as here I have named, SpaceoFlashLight and company domain and package name.
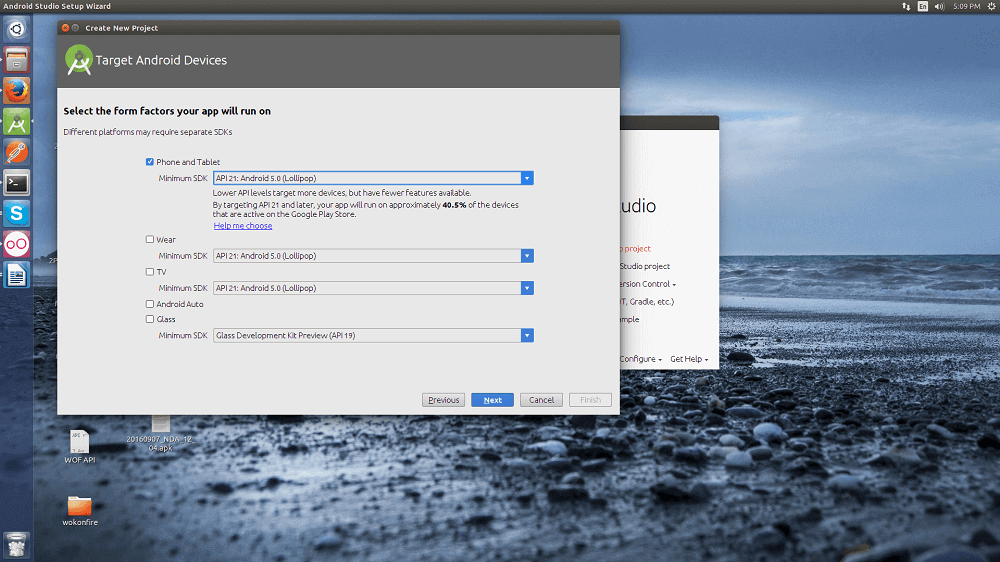
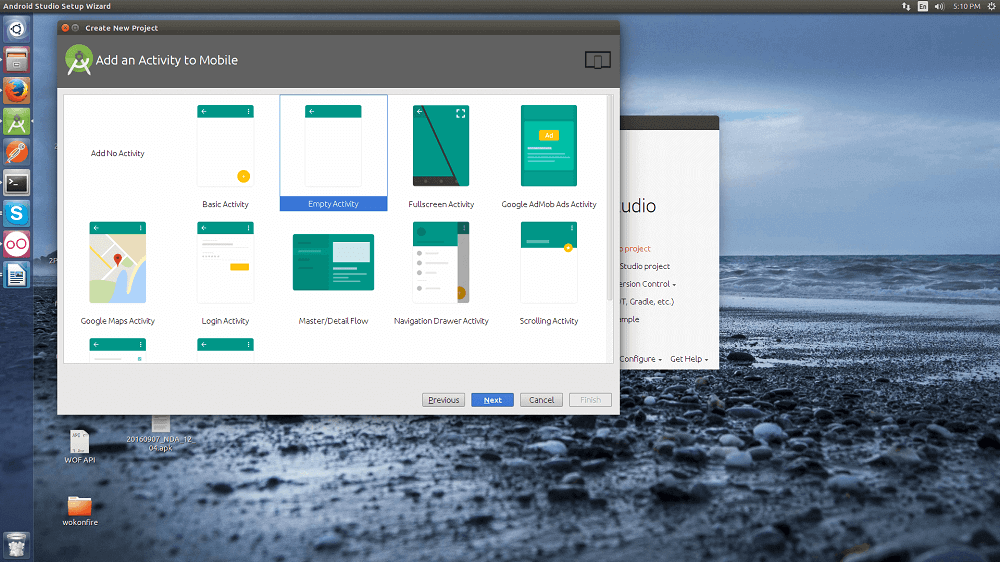
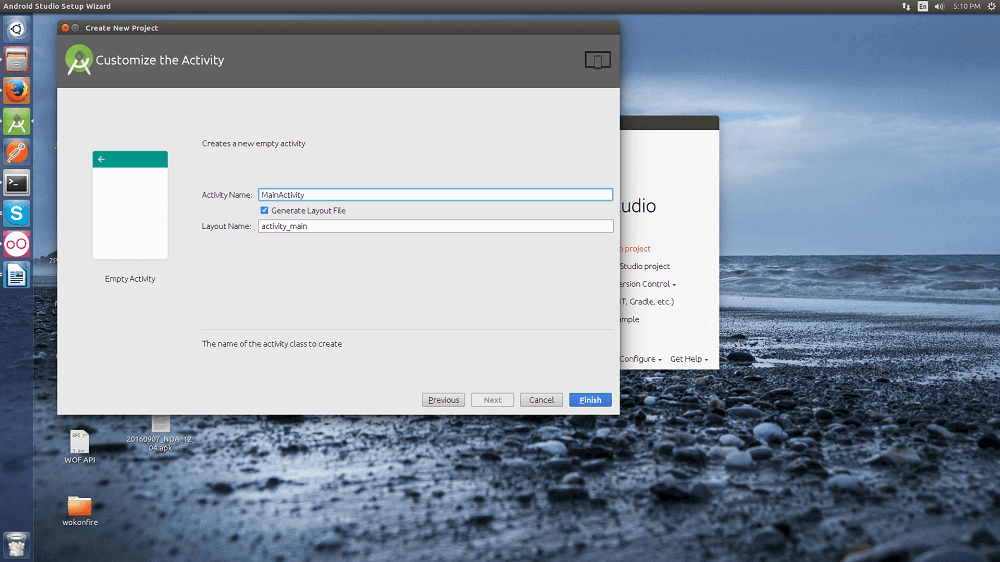
 Now, click ‘Next’ and choose Minimum SDK. We have kept the default setting and click Next. After that, you have to choose Empty Activity and click ‘next’.
In the next screen, enter Activity Name like I wrote here MainActivity and remember to check the Generate Layout Button and then click Finish.
- Add permission in manifest file
Now, you have to add Permissions in the Android Manifest.xml file to access Camera and FlashLight. For that, you have to open your AndroidManifest.xml file and add the code from the attached AndroidManifest.xml file.
<uses-permission android:name="android.permission.CAMERA"/>
<uses-permission android:name="android.permission.FLASHLIGHT"/>
<uses-feature android:name="android.hardware.camera"/>
<uses-feature android:name="android.hardware.camera.flash"/>
- Add this code to design layout
<?xml version="1.0" encoding="utf-8"?>
<RelativeLayout xmlns:android="http://schemas.android.com/apk/res/android"
	xmlns:tools="http://schemas.android.com/tools"
	android:layout_width="match_parent"
	android:layout_height="match_parent"
	android:paddingBottom="@dimen/activity_vertical_margin"
	android:paddingLeft="@dimen/activity_horizontal_margin"
	android:paddingRight="@dimen/activity_horizontal_margin"
	android:paddingTop="@dimen/activity_vertical_margin"
	tools:context="com.spaceoflashlight.MainActivity">

	<ImageView
		android:id="@+id/ivOnOFF"
		android:layout_width="wrap_content"
		android:layout_height="wrap_content"
		android:layout_centerHorizontal="true"
		android:layout_centerVertical="true"
		android:layout_gravity="center"
		android:src="@drawable/off"/>
</RelativeLayout>
- Declare variables
Note: Here, we have to use camera2 API, as camera API is depreciated
/**
* Object for camera service
*/
private CameraManager objCameraManager;

/*** id of current camera */
private String mCameraId;

/*** imageview in design which controls the flash light */
private ImageView ivOnOFF;

/*** Object of medial player to play sound while flash on/off */
private MediaPlayer objMediaPlayer;

/*** for getting torch mode */
private Boolean isTorchOn;
- In Oncreate method, you have to check if a device has flashlight capability or not.
	ivOnOFF = (ImageView) findViewById(R.id.ivOnOFF);
	isTorchOn = false;

	/**
	 * Check if device contains flashlight
	 *
	 * if not then exit from screen
	 *
	 */

	Boolean isFlashAvailable = getApplicationContext().getPackageManager()
			  .hasSystemFeature(PackageManager.FEATURE_CAMERA_FLASH);
	 if (isFlashAvailable) {
		AlertDialog alert = new AlertDialog.Builder(MainActivity.this).create();
		alert.setTitle(getString(Rstring.app_name));
		alert.setMessage(getString(R.string.msg_error));
		alert.setButton(
			DialogInterface.BUTTON_POSITIVE,
			getString(R.string.lbl_ok),
			new DialogInterface.OnClickListener(){
				public void onClick (DialogInterface dialog, int which ) {
					finish();
				}
			});
		alert.show();
		return;
	}
- Get access to camera service
objCameraManager = (CameraManager) getSystemService(Context.CAMERA_SERVICE);
    try {
    mCameraId = objCameraManager.getCameraIdList()[0];
    } catch (CameraAccessException e) {
    e.printStackTrace();
}
- Add methods to make On and Off and play sound accordingly
/**
* Method for turning light ON
*/
public void turnOnLight() {
    try {
        if (Build.VERSION.SDK_INT >= Build.VERSION_CODES.M) {
            objCameraManager.setTorchMode(mCameraId, true);
            playOnOffSound();
            ivOnOFF.setImageResource(R.drawable.on);
        }
    } catch (Exception e) {
        e.printStackTrace();
    }
}

/**
* Method for turning light OFF
*/
public void turnOffLight() {
    try {
        if (Build.VERSION.SDK_INT >= Build.VERSION_CODES.M) {
            objCameraManager.setTorchMode(mCameraId, false);
            playOnOffSound();
            ivOnOFF.setImageResource(R.drawable.off);
        }
    } catch (Exception e) {
        e.printStackTrace();
    }
}

private void playOnOffSound() {
    objMediaPlayer = MediaPlayer.create(MainActivity.this, R.raw.flash_sound);
    objMediaPlayer.setOnCompletionListener(new MediaPlayer.OnCompletionListener() {
        @Override
        public void onCompletion(MediaPlayer mp) {
                mp.release();
            }
        });
    objMediaPlayer.start();
}
- Add methods to On and Off the torch according to screen On and Off
@Override
protected void onStop() {
    super.onStop();
    if (isTorchOn) {
    turnOffLight();
    }
}

@Override
protected void onPause() {
    super.onPause();
    if (isTorchOn) {
    turnOffLight();
    }
}

@Override
protected void onResume() {
    super.onResume();
    if (isTorchOn) {
    turnOnLight();
    }
}
- Toggle Flashlight On and Off on button click
ivOnOFF.setOnClickListener(new View.OnClickListener() {
    @Override
    public void onClick(View v) {
        try {
            if (isTorchOn) {
                turnOffLight();
                isTorchOn = false;
            } else {
                turnOnLight();
                isTorchOn = true;
            }
        } catch (Exception e) {
            e.printStackTrace();
        }
    }
});
Want to Develop an Android Application?
Looking to bring your Android application idea to life? Get in touch with us for expert Android app development services.

Click the Following Link to Download the Entire Code.
Create Your Own Flashlight Android App Now
Hope, this android tutorial will help you out to create Android app that turns On/Off device flashlight/torchlight with a touch. In case, if you still face a problem to implement flashlight, you can contact Space-O Technologies, one of the best mobile app development service providers in India.
Useful resources