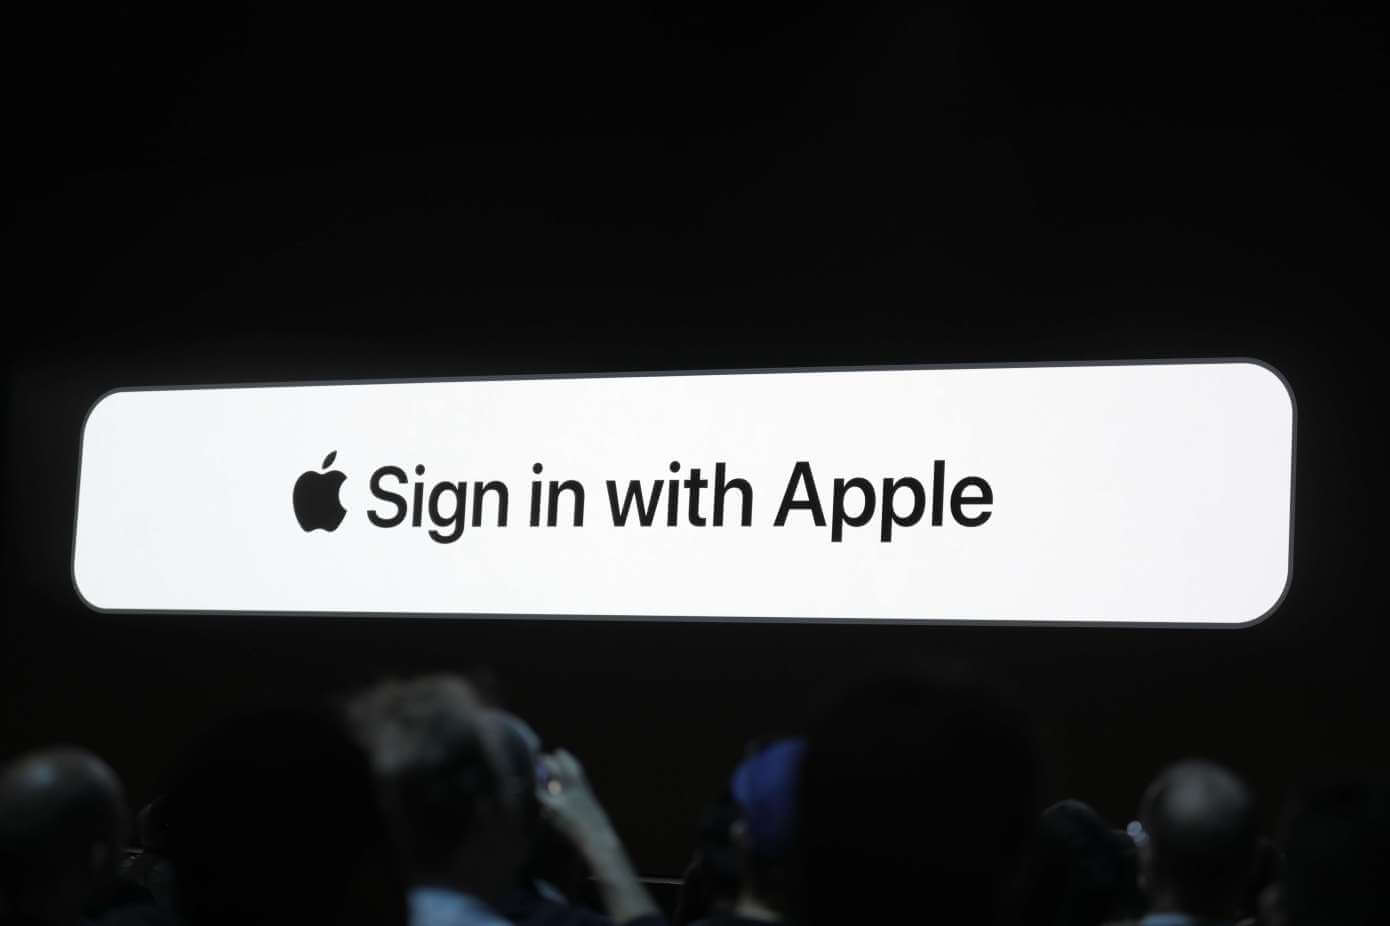
Signing in with Google and Facebook has been a norm for as long as one can remember. This changed on June 3, 2019. During WWDC 2019 at San Jose, Apple announced the new ‘Sign in with Apple’. This feature will only be compatible with versions iOS13 and later.
Being an iOS app development company, we keep eye on upcoming trends and technologies from Apple. This article is the output of it. In this Sign in with Apple (iOS Swift) tutorial, you will learn about how to integrate this feature in your app.
Table of Contents
With every announcement, Apple brings in newer features and better-updated versions of its technology. In the WWDC in 2019, Apple announced various new updates and features like Sign in with Apple, Dark Mode, iOS 13 features, and Multiple windows feature in iPadOS.
Apple is making its sign-in required whenever a third-party (whether it’s Facebook, Google, Instagram, Snapchat, or any other) log-in option is provided, giving users a private choice. Seeing WWC 2019, one of our experienced iOS developers wrote this Apple Swift tutorial on how to integrate ‘Sign in with Apple’ feature into your iOS application.
Want to Develop an iOS App with ‘Sign in with Apple’ Feature?
Get started on your iOS app development with ‘Sign in with Apple’ feature by reaching out to us now

If you want to integrate Sign in with Apple feature in your iOS mobile application and want to make the login of your mobile app simpler and safer for your user, this is the right blog for you.
Why ‘Sign in with Apple’?
In one word- privacy.
Amidst scandals revolving privacy and security breaches by Google and Facebook, this announcement comes as a breath of fresh air.
“‘Sign in with Apple’ is a fast, easy way to sign in, without all the tracking,” said Craig Federighi, Apple’s software engineering chief, probably taking a dig at Apple’s competitors. The only data that is collected is the user’s name and email address. The user can even choose to hide their email address in the app.
Security
A user account is always secure as every account using ‘Sign In with Apple id’ gets automatically protected with two-factor authentication. This is done by adding Touch ID or Face ID as a second layer of protection after the username/password combination.
Multiple platforms
It works natively on iOS, macOS, tvOS, and watchOS. You can also deploy it on your website and in different versions of your apps running on other platforms. For apps on Android devices and the web, users are sent to a ‘web view’ of the app where they need to click on Sign in with Apple and enter their AppleID and password to complete their sign in.
Prevent fraud
Using advanced machine learning it can send alerts if the new account on your app is (probably) not a real person. The developer can take this alert into consideration while processing their own additional anti-fraud measures or while providing permission to features in their apps
Non-repetitive logins
If the user already has an account with the app, they will be alerted and asked if they wish to log in with the existing email instead.
Before we take you towards step by step guide, please allow us to update that if you are not very much into the technical part, feel free to get in touch with our technical team directly by filling the form in the footer. State your requirements and we will allocate a dedicated iOS developer who can help you out. So far, we have developed a lot of iOS applications in the different categories which require the log-in feature.
Steps to Integrate ‘Sign in with Apple’ Feature in Your iOS App
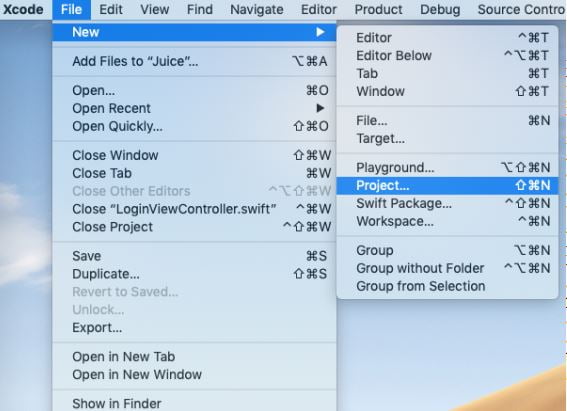
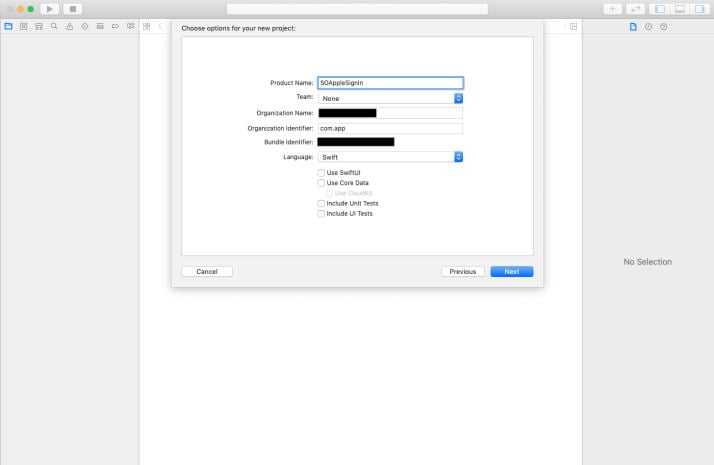
Create a New Project in Xcode
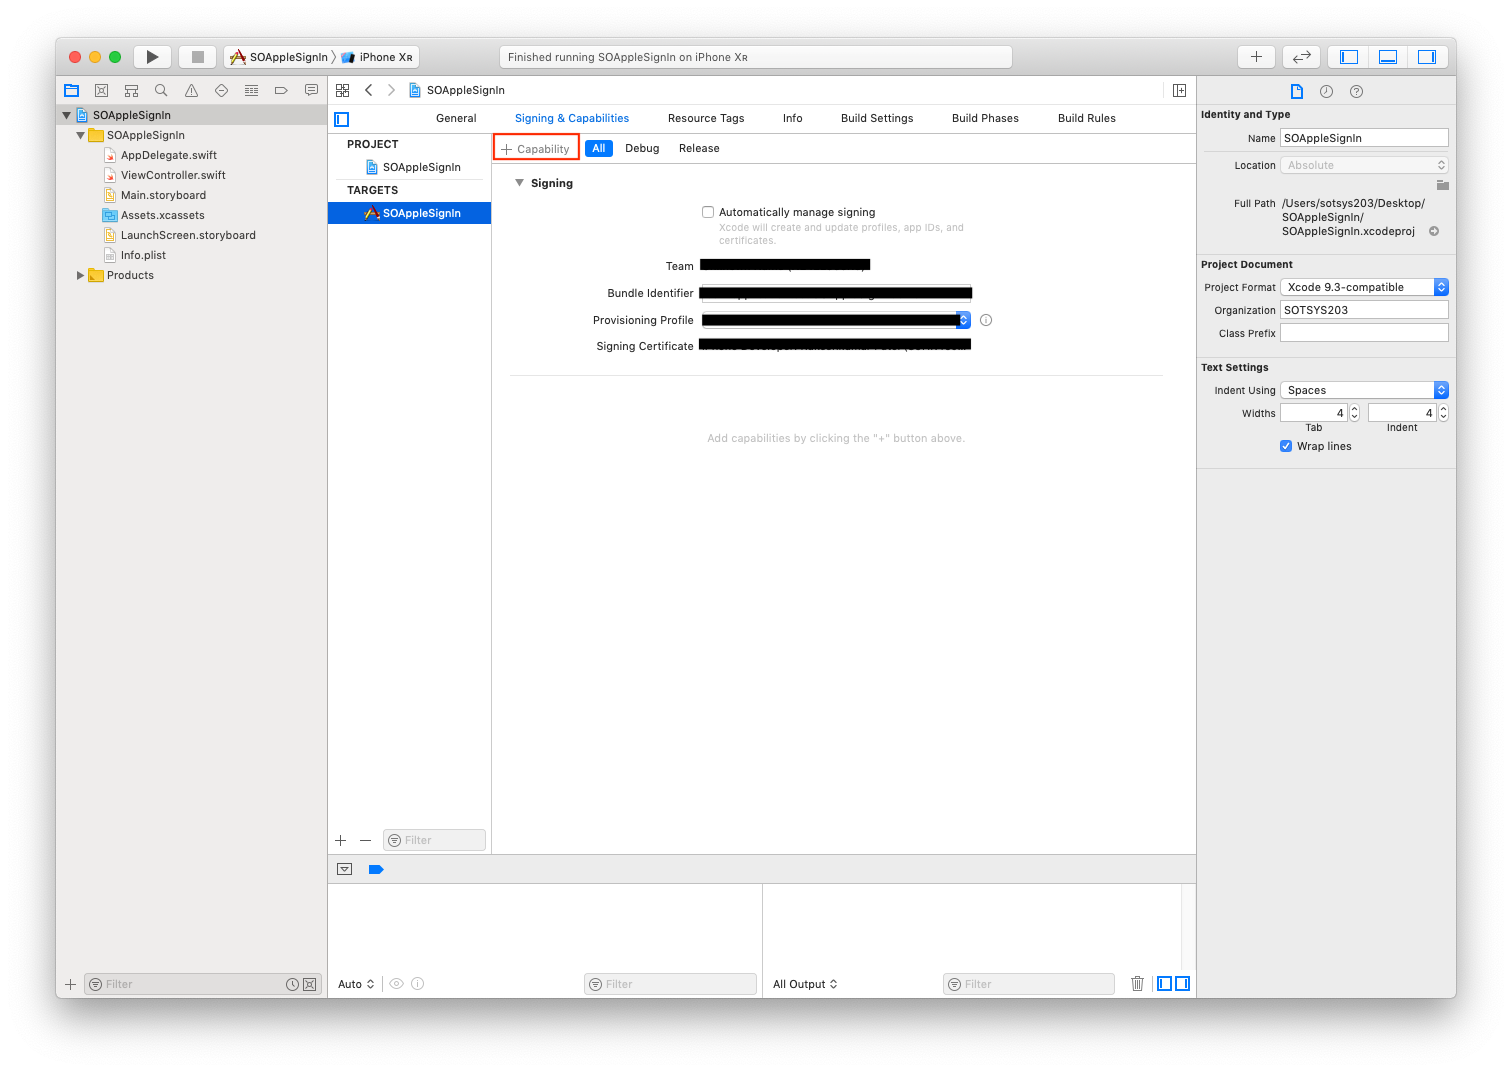
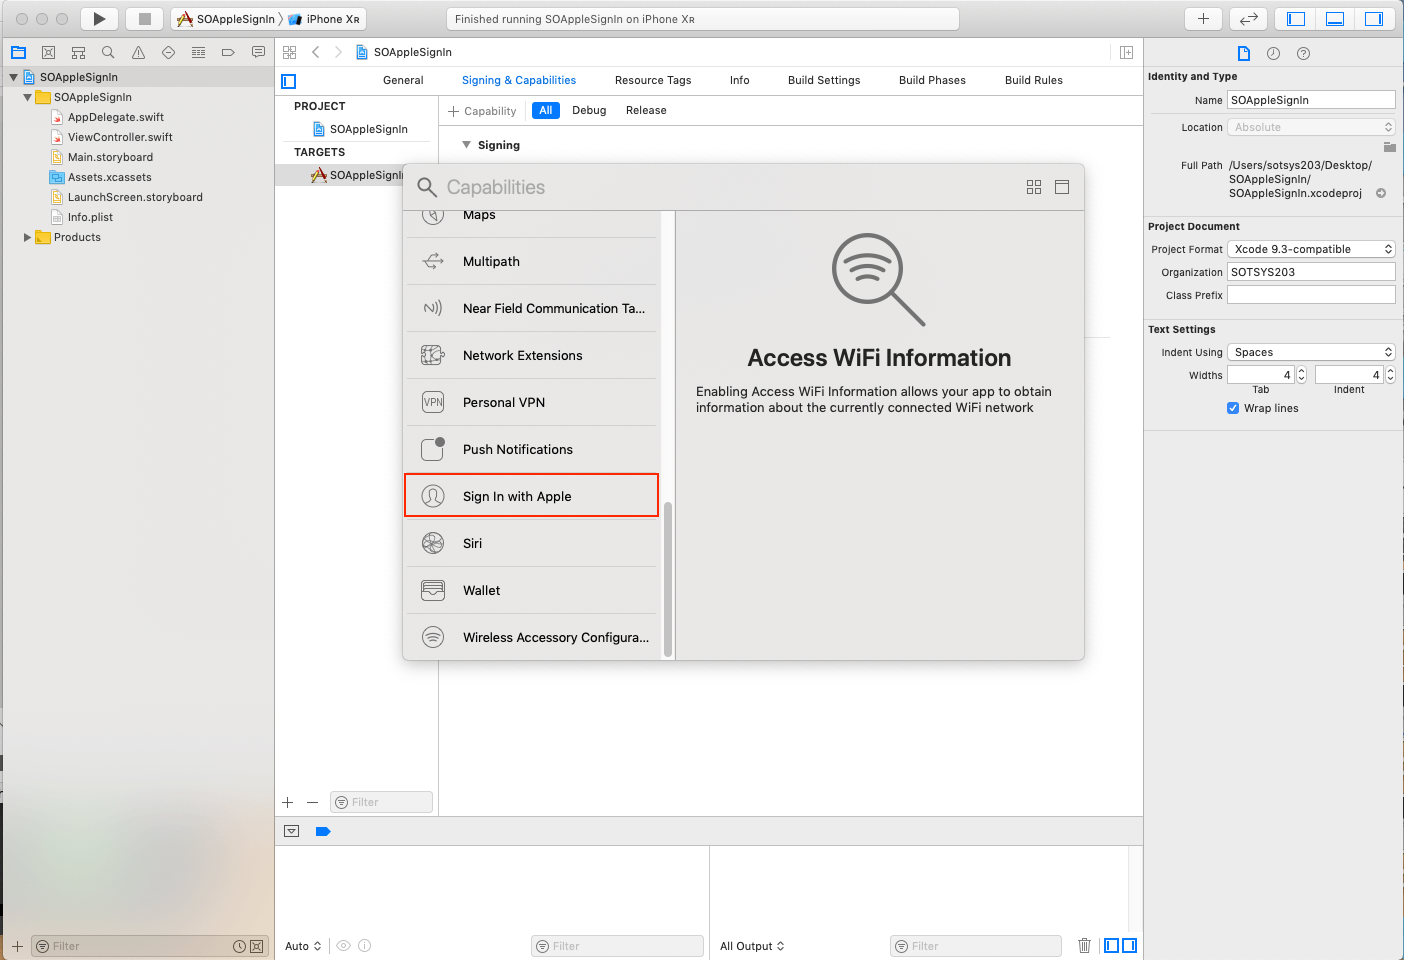
Go to “Target” and click on “Capability”
Add the “Sign in with Apple” Capability in your project
Go to the “ViewController.swift” and Import ASAuthenticationServices framework (framework for “Sign In with Apple”)
Add the “Sign in with Apple” button in ViewController after adding the target for TouchUpInside action and add action to the login button click.
Handle ASAuthorizationController Delegate and Presentation Context for success / failure response.
You need to enable Sign in with Apple in your developer account.
- This feature allows the user of the app to create an account, complete with all the details like name, email address, and verifiable stable identifiers.
- This account will help the user to sign in anywhere where your app is deployed- iPhone, iPad, macOS, tvOS.
- If your app requires a user account for better performance or for unlocking specific functionality, the sign in with Apple feature is helpful.
- The feature also helps the user to create an account after they have interacted with certain features of the app or made a purchase.
- The same account lets the user to reauthenticate on the app or website
- Your app uses your company’s own account and sign-in setups.
- Your app is a business, enterprise, or education app which uses an existing enterprise or education account.
- Your app authenticates users using government or industry-backed citizen identification or electronic ID.
- Users require to sign into their mail, social media, or third-party account but the app is a client for a specific third-party account and users directly access their content.
- Dark Mode
- Revamped Photos app
- HomeKit Secure Video
- All-new Reminders app
- Memoji and stickers
- Name and image in Messages
- Smarter, smoother Siri voice assistance
- Swiping keyboard
- Multi-user HomePod
import AuthenticationServicesThis provides the ASAuthorizationAppleID button.
override func viewDidLoad() {

        super.viewDidLoad()

        // Do any additional setup after loading the view.

        self.setupSOAppleSignIn()

    }

       func setupSOAppleSignIn() {

        let btnAuthorization = ASAuthorizationAppleIDButton()

        btnAuthorization.frame = CGRect(x: 0, y: 0, width: 200, height: 40)

        btnAuthorization.center = self.view.center

        btnAuthorization.addTarget(self, action: #selector(actionHandleAppleSignin), for: .touchUpInside)

        self.view.addSubview(btnAuthorization)

    }

@objc func actionHandleAppleSignin() {

        let appleIDProvider = ASAuthorizationAppleIDProvider()

        let request = appleIDProvider.createRequest()

        request.requestedScopes = [.fullName, .email]

        let authorizationController = ASAuthorizationController(authorizationRequests: [request])

        authorizationController.delegate = self

        authorizationController.presentationContextProvider = self

        authorizationController.performRequests()

    }
You can create an extension as well as add a source in an existing class.
extension ViewController: ASAuthorizationControllerDelegate {

     // ASAuthorizationControllerDelegate function for authorization failed

    func authorizationController(controller: ASAuthorizationController, didCompleteWithError error: Error) {

        print(error.localizedDescription)

    }

       // ASAuthorizationControllerDelegate function for successful authorization

    func authorizationController(controller: ASAuthorizationController, didCompleteWithAuthorization authorization: ASAuthorization) {

        if let appleIDCredential = authorization.credential as? ASAuthorizationAppleIDCredential {

            // Create an account as per your requirement

            let appleId = appleIDCredential.user

            let appleUserFirstName = appleIDCredential.fullName?.givenName

            let appleUserLastName = appleIDCredential.fullName?.familyName

            let appleUserEmail = appleIDCredential.email

            //Write your code

        } else if let passwordCredential = authorization.credential as? ASPasswordCredential {

            let appleUsername = passwordCredential.user

            let applePassword = passwordCredential.password

            //Write your code

        }

    }

}

extension ViewController: ASAuthorizationControllerPresentationContextProviding {

    //For present window

    func presentationAnchor(for controller: ASAuthorizationController) -> ASPresentationAnchor {

        return self.view.window!

    }

}
Go to “Certificates, Identifiers & Profile” section and then click on the “Keys” option.

Click on the “Create a key” option. Enter the name of the key and enable the “Sign in with Apple” option
![]()
Done.
Now, we’ll talk about some of the benefits of this feature.
What are the Benefits of Sign in with Apple?
However, Apple has given certain guidelines to the developers and entrepreneurs in order to use the feature in their iOS apps.
Guidelines to Use Sign-in With Apple Feature in Your iOS Apps
If any app uses a third-party or social login service to authenticate the user’s primary account, the app must offer Sign in with Apple as an option.
You do not require this feature if:
Want to Develop an iOS App with the Latest Features?
We will now answer some of the frequently asked questions.
Frequently Asked Questions
Which apps use the sign in with Apple?
A bunch of top app developers has embraced the feature pretty quickly. You will find this feature in apps like Poshmark, Zillow, Bumble, Adobe, TikTok, GroupMe among other apps.
Will the developer/owner get any detail of the user when he chooses to sign in with Apple?
The developer only receives the name of the user associated with the Apple ID and email address. All the other information like contact info, social ID is not sent to the developer. There are stable identifiers that are used to keep all the information private.
Which are the other features of iOS 13?
Conclusion
We hope you found this tutorial helpful. With the help of this iPhone app tutorial, we have learned how to integrate the ‘Sign in with Apple’ button for login into an iOS app. You can get the source of this sign-in with Apple example from Github.
Being an iPhone app development company, thriving in iOS app development, our developers are always eager to help other developers. We have developed over 3500+ mobile applications over the past 9 years for both iOS and Android platforms, and we continue to grow.
If you still have any doubts about iOS app development, Android app development, or any mobile app development in general, we are happy to guide you.
