By
By ![How-to-Develop-an-iOS-App-[A-Complete-Guide]](https://www.spaceotechnologies.com/wp-content/uploads/2021/05/How-to-Develop-an-iOS-App-A-Complete-Guide.jpg)
Looking to develop an iOS app?
In this guide, we will show you how to develop an iOS app and the prerequisite you need to know before developing an iOS app.
Being a leading iOS app development services providing company, we know how to develop iOS apps easily. So, here is a brief comprehensive guide for you. To write this guide, we have contacted app development consultants and the head of the iOS team who has built over 2800 iOS apps.
Let’s understand this further.
Table of Contents
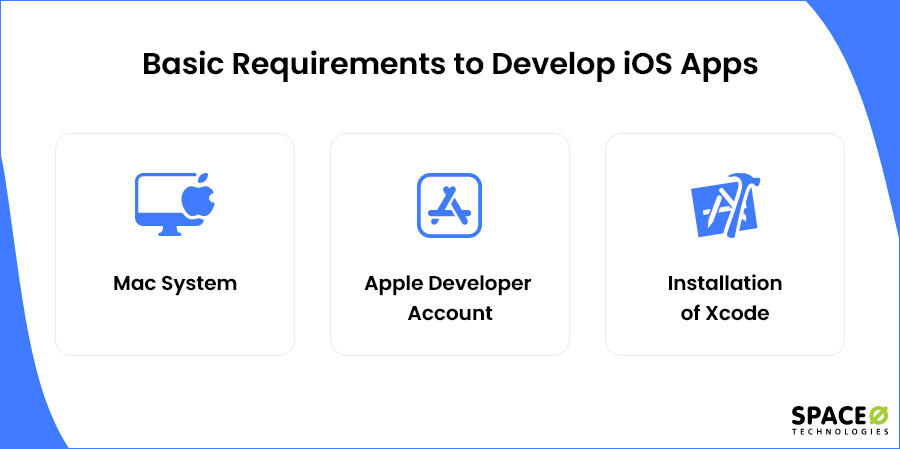
Basic Requirements to Develop iOS Apps
Before diving into custom iOS application development, you must understand the basic requirements and programming languages like Swift and Objective-C to build iOS apps.
-
Mac System
To answer your question about how to build an ios app, start working with the current version of Xcode, you need a Mac Computer with an Intel processor running on the latest Mac OS version.
You can purchase a Mac Mini. After you get the Mac Mini, attach it with your monitor screen and you are ready.
Mac Mini comes with a 3.0 GHz Core i5 processor and 8 GB memory.
Since the better hardware configuration will allow seamless iPhone application development. As you have understood in and out of the Mac system, it is time for registering yourself for an Application Developer account.
-
Register for an Application Developer Account
Registering for an Apple Application Developer account is free. After successful registration, you will have permission to download Xcode, and access iOS SDK and development videos along with technical resources.
Now is the time to register yourself at Apple’s developer website. In case of doubt, there is a step-by-step guide on Apple’s official website or iOS platform. You just require to create an Apple ID (if you don’t have one) and mention all the information in your personal profile.
Now, let’s check to set up Xcode by following the step-by-step method.
-
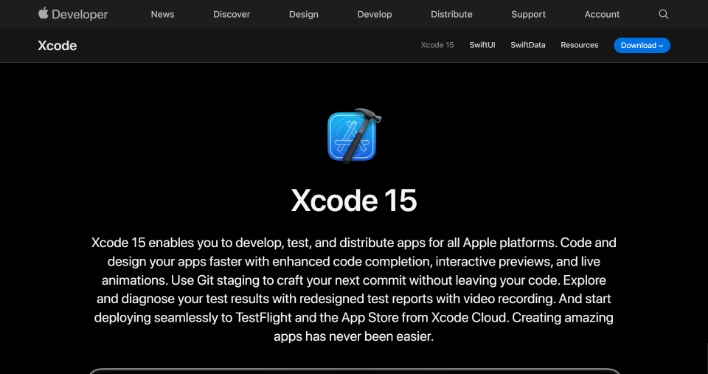
Installation of Xcode
The only tool you need initially to develop an iOS application is Xcode. Xcode is Apple’s Integrated Development Environment (IDE) for iOS and Mac Apps.
When you will start building your apps, you will use the graphical interface of Xcode to perform seamless iOS programming. Xcode consists of frameworks, compilers, tools, and iOS SDK. You will need all these for designing a user interface, software development, and debugging purposes.
As you have familiarized yourself with Xcode, an IDE, it is time that you get acquainted with the installation procedure of Xcode:
Step 1: Launching of Mac App Store. You can find the Mac App Store icon in the dock if you are using the latest version of Mac OS. Upgrade your Mac OS if you are unable to find it.
Step 2: Search “Xcode” in the Mac App Store and click on the FREE button to download it.
Step 3: As the download will complete, the Xcode folder will be found on the launchpad.
That is it. Now, you can easily open Xcode and start building your apps for iOS.
How to Develop an iOS App in 5 Steps
Here is a step-by-step guide to developing an iOS app
-
Setting Up Your Development Environment
To develop an iOS app, you first need to set up your development environment. This begins with acquiring the essential tools. The primary tool for iPhone app development is Xcode, Apple’s official integrated development environment (IDE). You can download Xcode directly from the Mac App Store. Once installed, take some time to familiarize yourself with its interface, as it’s where you’ll be spending most of your development time.

-
Registering for an Apple Developer Account
Next, you’ll need to register for an Apple Developer Account. This account is crucial if you wish to test your app on an actual device or eventually submit it to the App Store. While there’s a free tier available, to access all features, including app distribution, there’s an annual fee.
-
Designing Your App’s User Interface
With your environment set up, you can start developing your app. Launch Xcode and create a new project. This will give you a basic template to start with. From here, you can start UI design of your app. Xcode provides a visual interface designer where you can drag and drop various UI elements like buttons, labels, and images. This visual representation is known as the storyboard.
-
Coding and Functionality with Swift
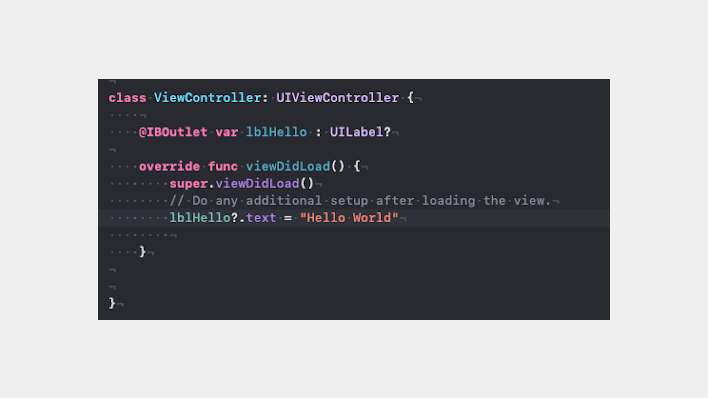
However, an app isn’t just about its appearance; it’s about functionality. This is where the Swift programming language comes into play. Swift is Apple’s recommended language for iOS mobile app development. Within Xcode, you’ll find Swift files associated with different parts of your app. Here, you’ll write the code that dictates what happens when a user interacts with the elements you placed in your storyboard.
The programming should be done in the ViewController.swift file. Moreover, you can always check other files as well. Main.storyboard file is UI, but we will talk about it in a later section. Leaving appDelegate we will jump right on to programming.
- Open ‘ViewController.swift’
- In ViewController.swift we define the outlet of a label and assign text “Hello World”.

-
Testing Your iOS App
Xcode offers a simulator that mimics the behavior of various iOS devices. This allows you to see how your app would run on an iPhone or iPad without needing the physical device. However, it’s always a good idea to test on a real device if you can.
-
Deploying to the App Store
Once you’re satisfied with your app’s functionality and design, and after rigorous testing, you can think about deploying it. Before submitting to the App Store, ensure your app adheres to Apple’s guidelines. Prepare your app’s listing with engaging screenshots, a compelling description, and any other required metadata. After submission, Apple will review your app, and if it meets their standards, it will be published on the App Store.
Planning to Build an iOS Application?
With a record of developing 2800+ iOS mobile apps, we have the right expertise to help you bring your vision to reality. Share your ideas with us to get started.

How to Shorten the Learning Curve of iOS App Development
- Set Clear Objectives:
Before diving into iOS mobile app development, outline your goals. Whether you’re aiming to develop a specific app, secure a job, or just acquire a new skill, having a clear objective will guide your learning journey and keep you motivated. - Master Swift
Swift is Apple’s programming language for app development for iOS. Begin with the basics of Swift, understanding its syntax, and core concepts. A strong foundation in Swift will make the subsequent stages of iOS app development smoother.
- Interactive Learning Platforms
Platforms like Swift Playgrounds offer an interactive environment where you can write Swift code and see immediate results. Such platforms are excellent for beginners as they provide instant feedback, making the learning process engaging and effective, and makes user interaction easy.
- Prioritize Hands-on Experience
Theory is essential, but practical application solidifies knowledge. Start by building small, simple apps to practice what you’ve learned. Over time, challenge yourself with more complex projects. Replicating existing apps can also be a great way to understand the development process.
- Utilize Templates
There are numerous iOS app templates available online. These templates can give you a head start by providing a pre-defined structure for your app, allowing you to focus on customization and functionality rather than starting from scratch.
- Online Courses and Tutorials
Websites like Udemy, Coursera, and RayWenderlich offer structured courses tailored for different skill levels. These platforms often provide a mix of video lectures, reading materials, and hands-on projects. Additionally, Apple’s official documentation and tutorials are invaluable, offering insights directly from the source.
- Join Bootcamps
Bootcamps are intensive training programs designed to take you from beginner to proficient in a short time. While they require a significant time commitment and often come with a cost, the focused curriculum and expert guidance can drastically shorten the learning curve.
- Engage with the Developer Community
The iOS developer community is vast and active. Engaging in forums, attending local developer meetups, or participating in online platforms like Stack Overflow can provide support, answer queries, and offer opportunities for collaboration.
- Master Debugging Early
Debugging is a crucial skill. Familiarizing yourself with Xcode’s debugging tools early on will help you identify and rectify errors efficiently, saving time and frustration in the long run.
- Stay Updated
The tech world, especially mobile app development is ever-evolving. Subscribing to iOS mobile application development blogs, podcasts, or YouTube channels ensures you’re always informed about the latest trends, tools, and best practices.
Have Everything You Need to Build Your iOS App?
Let our experts transform your iOS app idea into a high-quality product with effective tools and strategies.
Need Expert Guidance to Build Your Next iOS Application?
Building a successful iOS app takes more than knowing Swift or Xcode. It needs a development partner who understands user behavior, App Store guidelines, and the technical choices that separate a good app from a great one. At Space-O Technologies, we have spent over a decade helping startups and enterprises turn iOS app ideas into real products, with 2800+ apps delivered across healthcare, fintech, on-demand, eLearning, and eCommerce.
Our iOS team handles every stage of development, from idea validation and UI/UX design to Swift coding, QA testing, App Store submission, and post-launch support. We also offer dedicated iPad app development services for businesses targeting larger-screen experiences. We follow Apple’s Human Interface Guidelines, write clean and maintainable code, and use the latest frameworks like SwiftUI, Core ML, and ARKit when your project needs them. Every project is covered by an NDA, so your idea stays protected from the first conversation.
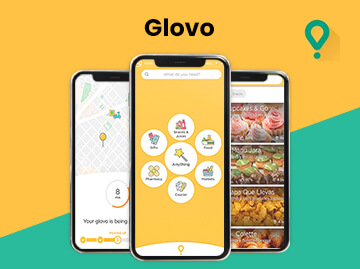
Our work includes Glovo, a delivery app that secured $1.2 billion in funding and 30M+ downloads, Fyule Video Lab, an eLearning platform backed by $1.4 million, and Daymera, a goal-tracking app built for iOS users. Whether you are validating an MVP or modernizing a legacy app, our experts can help you build something users love. Share your idea today and get a free 30-minute consultation, a custom estimate, and a clear roadmap to launch.
Food Delivery App That Secured Funding of $1.2 Billion
Glovo is one of the unicorn apps developed by Space-O. Apple chose Glovo for its “Best of 2016” award. This iOS app offers multi-category grocery product delivery and has over 30 million app downloads. TechCrunch, Financial Times, and Bloomberg have covered this application.
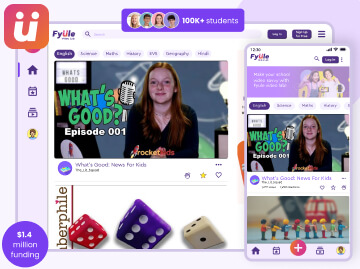
eLearning Platform That Secured Funding of $1.4 Million
We created Fyule Video Lab, a video learning platform for an EdTech startup, funded by $1.4 million from an Angel syndicate including leaders from Google, Deloitte, Tata 1mg, and Axis Capital. We developed this platform for iOS, Android, and web using Flutter, PHP, Laravel, and MySQL.
Daymera: Goal Tracking App Development for iOS Users
Daymera is a goal-tracking app for iOS users that allows them to track and achieve their goals. Apart from goal-tracking, it enables users to build connections and foster collaboration With features like goal setting, progress tracking, and user-friendly interfaces.
Frequently Asked Questions
Is it hard to learn iOS development?
With the latest Swift Language, Apple has optimized the tools and simplified syntax. Now, you just require a Mac with Xcode installed in it and helpful resources to get started. So, it is not as hard as you think to learn iOS mobile application development.
How much does it cost to develop an iOS app?
If we consider the hourly rate of $35 to $40, a basic app can cost from $3000 to $30,000, depending upon the timeline. As the requirements for features get complex, the cost also may increase.
What coding language is used for iOS apps?
A powerful and intuitive, Swift programming language is well known for making iPhone app, macOS, iOS, watchOS, and tvOS apps.
How to develop iPhone apps on Windows?
There are different ways to develop iOS apps on windows. You can use any one of them and build an ios app:
- Get a Mac in the Cloud
- Create iOS Apps on Windows with Cross-Platform Tools
- Build “Hackintosh” to Run Xcode
- Work in React Native Environment
- Use Xamarin to Write iOS Apps on Windows